Step 1: Setup Information
Click on the “Set Up” button now to begin the installation process. This will launch the setup wizard, which will guide you through creating a login, setting your Wi-Fi name, and finalizing the configuration.
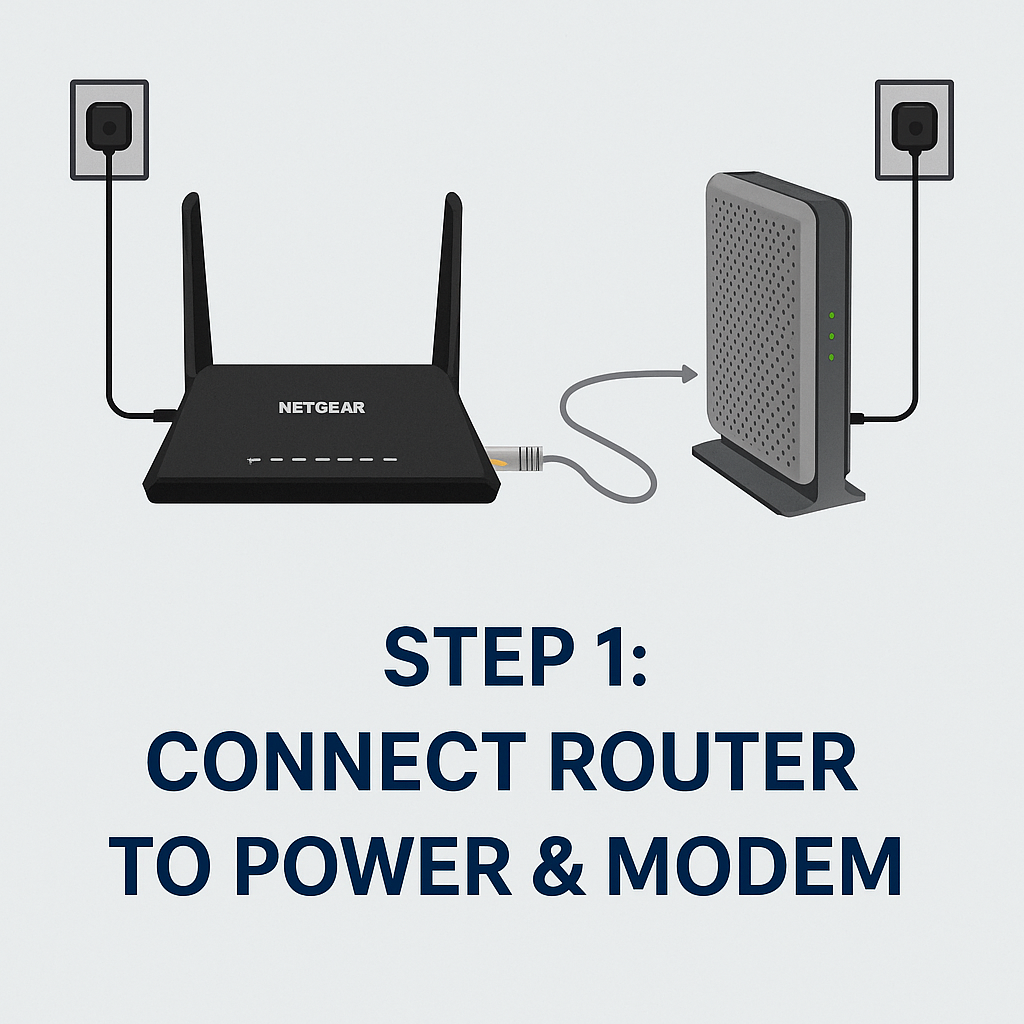
Step 2: Router Installation
Hardware Connection
Unbox your Netgear router and plug it into a power outlet.
Connect the Ethernet cable from your modem to the yellow Internet port on the router.
Wait for the Power LED to turn solid white or green.
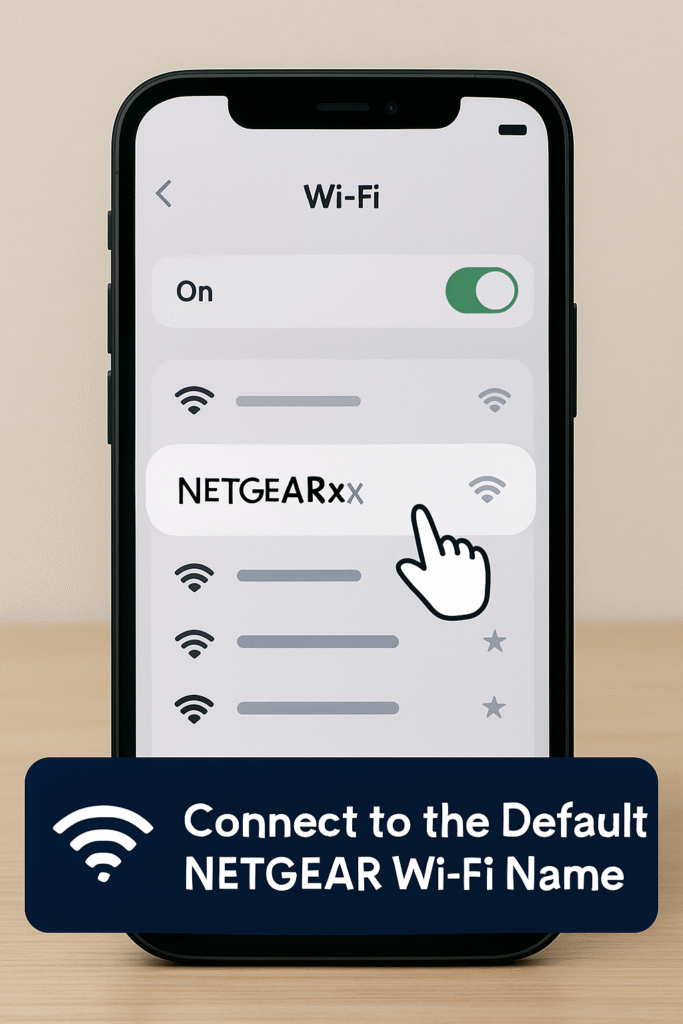
Connect to Network
On your phone or computer, go to Wi-Fi settings.
Select the default Netgear Wi-Fi name (SSID printed on the router label).
Use the default password (also on the router) to connect.
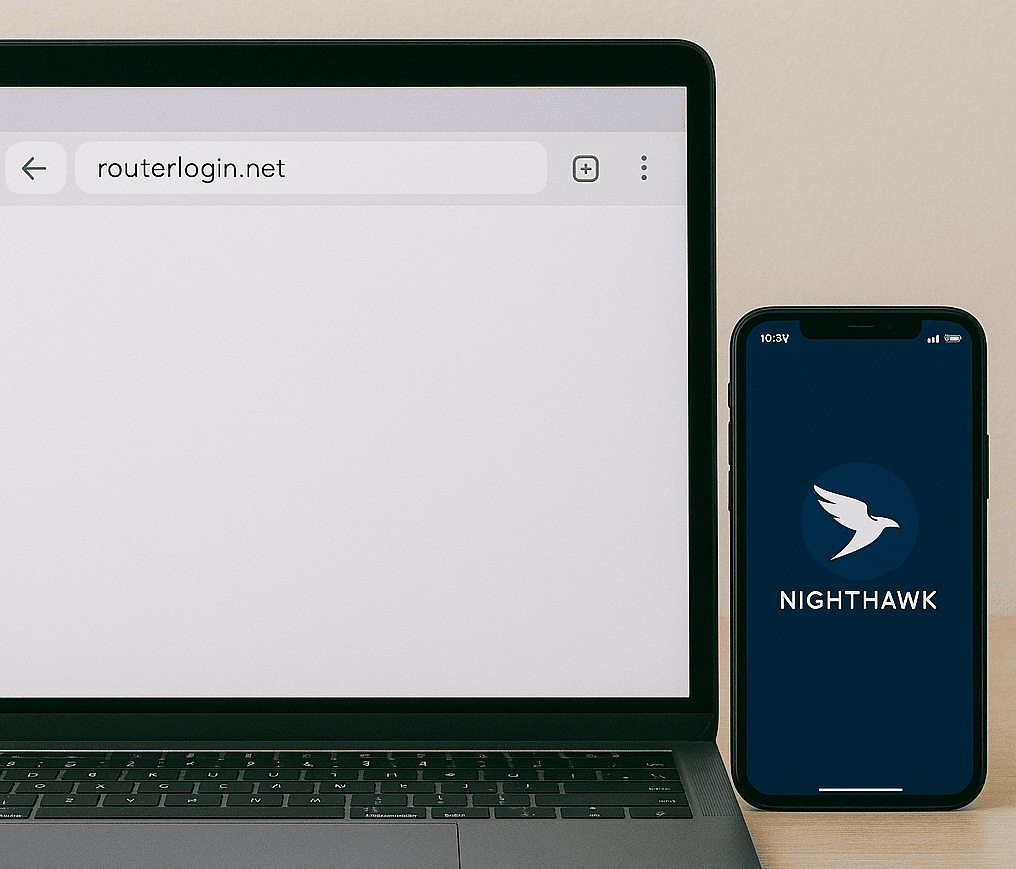
Router Configuration
Open a browser and visit http://www.routerlogin.net
Follow the on-screen instructions to:
Create admin login credentials
Set a custom Wi-Fi name and password
Apply any firmware updates
Need Assistance?
If you encounter any issues during setup, feel free to contact us. Our support team is ready to help!